Table of Contents
Who wouldn’t want to experience their Xbox One on a big screen rather than sticking to a limited TV screen size? Probably no one.
Playing games, primarily first-person shooter or RPG games on a large screen, transform the whole experience to a new level. So how can you experience it? Well, you just have to connect your Xbox One to the projector.
Well, now you can understand why many console gamers often switch to the projector and how it helps them to play co-op games with a simple split-screen.
But do you know how to connect Xbox One to a projector? You must be wondering how to set up the connection with a projector from Xbox one, but you won’t have to worry as we have found the solution.
A wired connection is the best possible option for hooking up these two devices, and the process of connecting them is quite simple.

So without further ado, let’s take a look at the process;
3 Steps For Connecting Xbox One To The Projector
- Identify the port connection (should go for HDMI)
- Connect HDMI cable to a projector
- Set HDMI on the projector as “source”
Here are the essential steps that would guide you to connect Xbox one to the projector easily. However, you have to be careful during the process as a loose connection, or improper cable may hinder the whole effort:
Step 1: Identify the port connection
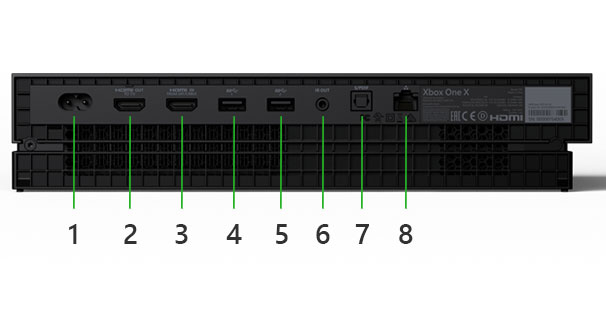
You need to identify what type of port connection is available in your projector. Nowadays, HDMI has become a standard port for almost all projectors, so you must have an HDMI (2.0 or 3.0) port at the rear section.
However, if you have an older projector, then you might have a VGA, DVI, S-Video, or composite video port.
You can’t utilize the USB port for audio and video transmission (currently, USB-C serves as an exception). You need to use an HDMI to RCA converters.

![]()
Microsoft Xbox One, on the other hand, only comes with an HDMI port for video and audio signal and utilizes a USB port for connecting accessories.
Step 2: Connect HDMI cable to a projector
Once you have evaluated the connection type and now you will have to decide which port you will utilize. HDMI is the most convenient and safest option for connecting Xbox One and projector as it ensures smooth connectivity with a high flow rate.
For connecting the Xbox One with VGA or another other port, you will have to use an adapter that is readily available in the market.
Even though adapters get the job done but they aren’t reliable, especially when it comes to the flow of the sound signal.
In numerous cases, there is a lag in the audio transfer causing flickering in the audio output. Sometimes there is degradation in the audio quality that ultimately hampers the overall gaming experience.
Now, if you are using the HDMI cable, we recommend you to opt for high-quality cable rather than cheap ones as they have a slow data flow rate.
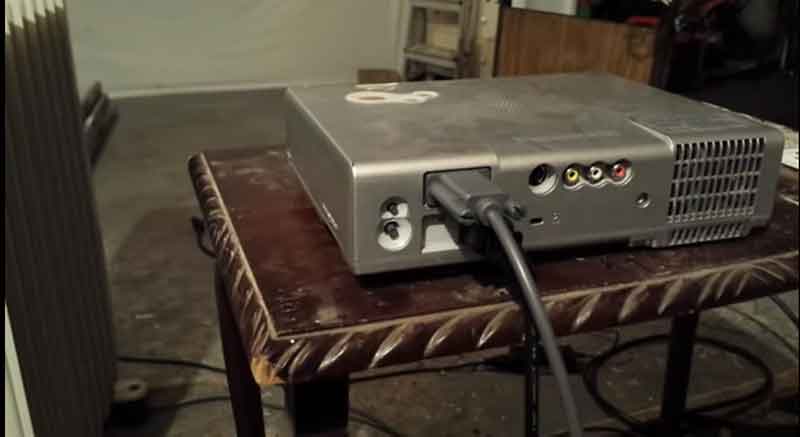
Connecting them is quite simple, and you just have to plug both ends at the HDMI port of both devices. While connecting them, you should be steady and slow and also make sure they are correctly inserted in the port.
If you are going for the adapter, then depending upon the port availability, connect one end of VGA, AV, or composite video cable to the specified port on the projector.
Put the other end of the cable to the rear side of the adapter and then put the HDMI end of the adapter to the HDMI port of the Xbox One.
For the VGA adapter, you should adequately tighten the screws as a loose end can lead to pixelation or a blacked-out screen.
Step 3: Set HDMI on the projector as “source”
Once you have completed connecting both the projector and Xbox One, then switch on the devices.
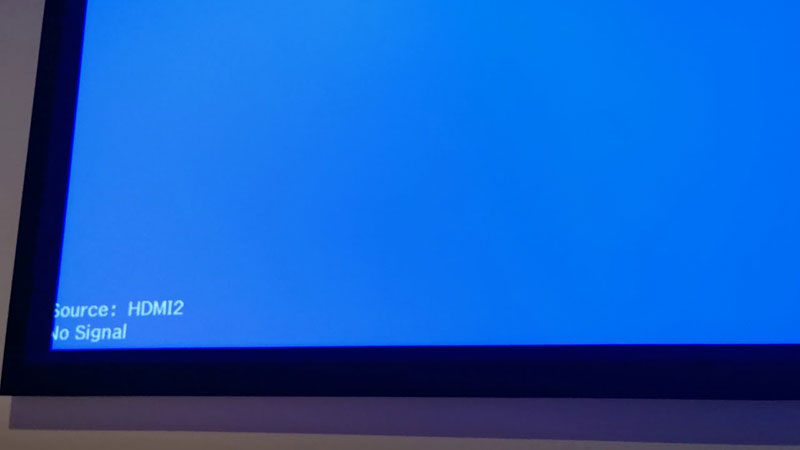
You will have to set the source to HDMI in your projector as not all projectors automatically detect the incoming signal.
After setting the source, your projector will quickly detect the HDMI signal and start projecting the main screen.
However, if you are using an adapter, then choose the source signal option according to the port you are using.
In case the projector doesn’t detect the incoming signal, then either replug the cable or restart the devices to complete the connection.
It is time to test the connection before you start your favorite game on the Xbox One and enjoy them on the big screen.
You should test running some videos to check whether you are getting both audio and video properly without any delay or other issues. Calibrate the images if you want so that they are in proper shape without any deformation.
That’s pretty much done!
Now, you can decide which audio you want to use as the inbuilt speaker of the projector won’t give you the immersive experience you want.
If you don’t want to disturb others in your home, then a headset would serve as a great option. You need to connect the 3.5mm jack in the audio port of the projector, and you will comfortably catch all the actions.
However, to add an external speaker to a projector, you need to utilize either the S/PDIF port or the USB port (in the case of portable units).
To discard all the confusion, it would be smart to add an A/V receiver that will let you hook different components at a centralized component.
Through an A/V receiver, you can easily switch to different components like a speaker, headphone, microphone, etc., without needing to change the wires.
Take the screen to an appropriate size and enjoy your favorite game.
Check the video:
Some of The Major Issues That May Occur During Connecting Xbox One to Projector and How You Can Fix Them
Here are some significant problems that often occur when a user ventures into connecting their projector with the Xbox One.
1. Screen Black Out
The first major problem that mostly occurs is blacked out the screen, and it occurs due to malfunctioning of cables.
It is always better to opt for high-quality cables from reputed brands as they ensure smooth connectivity.
Loose cable connection is another reason that causes blackouts, and putting the cable properly into the port will solve the issue.
2. Resolution mismatch
Resolution mismatch between the projector and Xbox One is a big issue often faced by gamers who are connecting Xbox One to the projector for the first time.
You have to make sure both of them are in the same resolution; otherwise, you won’t be able to project.
Keep the Xbox One’s resolution to the minimum level by connecting it to an HDTV. In a similar fashion, you will have to set the projector’s resolution similar or closer to the resolution of Xbox One.
EDID of the HDMI will always try to relay the best resolution possible, so you should always try to keep the Xbox One’s resolution lower than that of the projector’s.
3. Discrepancy in the refresh rate
The discrepancy in the refresh rate often leads to connection issues between the projector and Xbox One.
Xbox One generally tends to put out higher refresh while most of the projector is set at a low refresh rate (except few gaming units).
Xbox One produces around 120Hz refresh rate to give you the best gaming experience, but most of the projectors can’t handle such a high refresh rate.
The only solution is to lower the refresh rate, and it can be done by going to the display and sound menu of Xbox One.
You should select the refresh rate option and lower the rate to 24 or 50Hz, depending upon the projector.
Most of the modern projectors can handle 50Hz without much issue so that you won’t have a problem, and you will also get excellent smoothness.
Once you lower the refresh rate, the projector will automatically display the image on the big screen.
Still, if you are facing other issues apart from the above mentioned, then you can get in touch with us, and we will try to solve them as soon as possible.
However, we will suggest you get help from a local electronic expert as he will be able to solve the issue quickly.
Conclusion
We can wrap it up by saying that we have verified our steps before putting them forward to you so you can stay assured you are on the right path.
We have written the step by step process of how to connect Xbox One to a projector. We hope our guide will help you in every manner to complete the whole connection.
Even though this connection is not devoid of issue, the use of better cables or closely following our steps will help you minimize it.
Moreover, the newer the projector you get, the better your experience will be, and the lower the problem.
Related Articles: